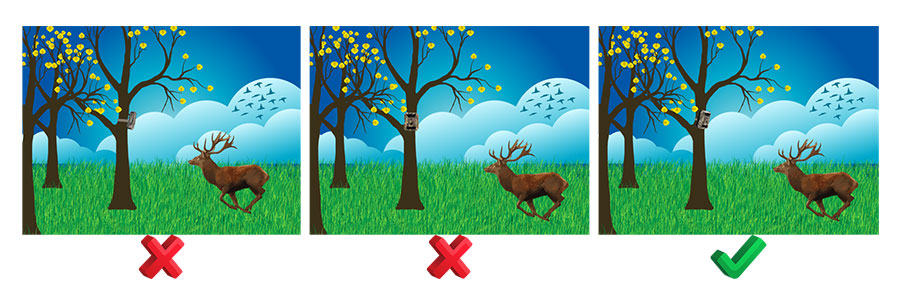
Nature can be a cruel mistress. It seems at times that there’s nothing she likes more than to frustrate our best laid plans at every turn. To fight back we turn to technology, but even then we can still get tripped up when our back is turned.
A great example of this is when your trail camera gets falsely triggered, so instead of capturing thrilling pictures of animals going about their business, all you see when you check the SD card is hundreds and hundreds of identical twig photos.
Fear not, take a look below at our handy pictures to see how to one-up nature and ensure you’re not wasting your time and precious battery power on those empty ghost photos.
If you have any questions be sure to email us at the WingHome team here and follow our Facebook page here for all the latest
WingHome trail camera news and hot deals.
1. North/South vs East/West

Unless you’re using some kind of night vision, the sun is the key to all photography and yet, when it comes to trail cameras, it can be something of a hindrance by causing false triggers. This comes down to the fact that trail camera motion detection sensors are alerted by the movement of heat-emitting objects, and of course there’s no greater moving, heat-emitting object than the sun! So it’s vital to point the camera away from the movement of the sun, i.e. North or South, NOT East or West.
2. Angle towards the path

A. Look straight at the camera and say cheese! This is the way we’re used to taking photographs but unfortunately it doesn’t work for trail cams. Since detection is triggered by the movement of heat-emitting objects it’s vital that the object, i.e. animal, moves across the field of view of the camera, as opposed to in a straight direction towards it. So even if the animal is well within the field of view of the camera, it could well not be triggered to take a photo.
B. You’d be forgiven for assuming then that it’s best to place it at 90 degrees to the probable path of the target animal. This can work if the animal is moving at a slow-to-moderate pace. But if the animal really tears it past, and your camera doesn’t have a particularly fast trigger speed, then the animal can have zipped past the field of view by the time the picture is taken, leaving you with that ghastly ghost photo.
C. So we need a compromise of keeping the animal in the camera’s field of view for as long as possible, while at the same time ensuring the animal moves horizontally across the camera’s motion detection sensor. Solution: set the camera at a 45-degree angle to the probable path of the target animal. Easy!
3. Removing obstacles

A. Again, it seems intuitive to point the trail camera at the same height as the kind of animal you’re tracking to get full-profile photos. The problem being is that unless your cam is well-camouflaged it might only work to spook the animal away, which kind of defeats the purpose of a trail cam in the first place.
Not only that, the movement of little critters on the forest floor, plus the swaying of grass reflecting the sun’s heat, and once more you’re at risk of false triggers. Your best bet then is to mount the camera about head height off the ground and simply tilt it towards the ground enough to target the kind of animal you’re after.
B. Higher up though there can still be obstacles in the way, potentially causing false triggers. That’s why you need to check for and clear any tall grass, branches, twigs, leaves etc. in the field of view of your trail cam.
4. It’s all hot air
 Using your trail camera for security
? Then there’s a good chance you’re going to be mounting it near some kind of building. Something to watch out for in this case is any kind of hot air vent from the likes of a dryer or air conditioner. Natural warm or hot wind is usually not a problem, especially out in the wild. Air vents, however, usually blow out air at a temperature quite a bit higher than the surrounding temperature. And it’s this difference in temperature between the moving air (or object) and the ambient temperature that triggers the camera’s motion detection sensor. So keep those air vents well away!
There you go, follow these 4 essential tips and you’ll be able to significantly cut down on trail cam false triggers, which will surely help you from getting triggered yourself.
For more from the home of trail cameras, follow our
Facebook page - WingHome here.
Happy trails from the WingHome team!
Graphics Provided by www.vecteezy.com


